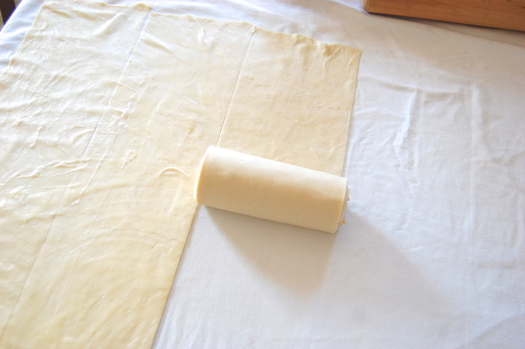
Category Archives: Techniques

Rehydrating Mexican Chiles

We modern foodie types are used to doing a lot of Continental cooking: French and Italian especially. So when we see a red or red-brown sauce we automatically assume there’s tomato in it. But in fact a lot of deep red and rust-colored Mexican sauces don’t have any tomato in them at all, just puréed chile pepper. Reconstituted dried chile pepper to be more exact.

You see them in Mexican grocery stores or international aisles in supermarkets, packaged in crackling cellophane bags. If you’ve ever looked those over and wondered what the heck you do with them, I’m here today to show you. But first you need to know that not all dried chiles are not equal. Some are much, much drier than others, and that can be a bad thing when it comes to say, making a tamal or enchilada sauce.

If you buy them where there’s a decent turnover, they’ll be dry but not brittle, and that’s what you want. You want chiles that are nice and flexible, that you can bend like this without them breaking. Like so:

If they don’t do that, then your odds of creating a great sauce are vastly diminished. Find another grocer with fresher products.

To begin processing them, tear them open. Just use your bare hands, they chiles won’t do anything to you. Tear off the stem and open the sucker up. You’ll find seeds inside. Shake them out.

Next, tear the chile into pieces about yay big:

When they’re all seeded and torn up, heat up a skillet — cast iron is perfect for this — over medium-high heat. Lay a chile strip in. No oil or fat of any type is needed here.

Using a heavy spatula, press the chile down onto the hot surface. After a few seconds, you’ll feel the spatula rise a little as the small amounts of moisture in the chile turn to steam and cause the flesh to bubble (these bubbles are what will allow moisture in so the flesh can reconstitute). This should take about 30 seconds.

When you start to see the odd puff of smoke, flip the chile piece over. It should be orange-colored and blistered.

Repeat the pressing for about 30 more seconds until the second side looks like the first.

Place the chiles in a bowl and pour boiling water over them. If they float too much, weigh them down with a spoon, cup or saucer.

After half an hour of steeping they’ll look like this:

At this point they’re ready to purée with onion, spices and some of that steeping liquid (and/or chicken stock) to make a chile sauce base. If you’re wondering whether a sauce made from nothing but puréed chile and onion will be spicy or hot, the answer is it all depends on what sort of chiles they are. The chiles pictured — ancho — aren’t particularly hot. Others are extremely so. It all depends on what the recipe calls for.

Oh but let me add: that liquid may or may not irritate the tissues under your fingernails, but it will stain like mad. Don’t get it on your clothes.

Filed under:  Pastry, Rehydrating Dried Chiles | 8 Comments

Shredding Suet

If you enjoy mincemeat and/or British puddings, you’ve no doubt seen suet on an ingredient list. An easy-melting, mild-tasting fat taken from the kidney region of a steer, suet is akin to leaf lard on a pig. Brits of yester-year employed it as an inexpensive fat for enriching sweet baking.

It’s actually still used quite a bit, especially during the holidays, which is why you can still find commercially-shredded and packaged suet in the British Isles. Here in States the only kind of suet we can get comes straight from the steer, so we have to do the shredding ourselves.

But why shred suet? Why not just chop it? The answer is because suet isn’t pure fat. It’s suffused with tissue. Chopped into cubes, the pieces will want to hold their integrity even as they get hot. Shavings of suet incorporate into a mincemeat or pudding mixture much more readily.

Shredding is an easy thing to do. The only critical bit is the angle at which you hold your knife. A cleaver-like implement is best for this job. You want to hold it at a roughly 45-degree angle. The stroke is down-and-away from the mass of suet. It ends in a near scrape.

Do it two or three times and you’ll have a small pile of flakes and shreds, like so:

Five minutes and you’ll have a good-sized heap, as well as some slightly sore fingers. Indeed the steady rapping of the knuckles that shredding entails is the reason matrons of yore hated this job.

When you’ve got as much as you need — this is about half a pound — go over the pile and chop it to ensure there are no lingering chunks or strings in there.

Refrigerate your shredded suet until it’s ready to use!

Filed under:  Pastry, Shredding Suet | 15 Comments

Peeling and Coring Apples

It struck me that a little tutorial on apple prep might be warranted this week. While you don’t need to get super-fussy with apple peeling and coring, a little extra care makes a big difference in apple presentation in everything from tarts and cakes to turnovers and pies. The big thing is to always use a vegetable peeler, and then peel the apple in a spiral, like so:

It’s exceptionally easy and just as fast as a knife. Speaking of which, use one to gently slice out the flower end…

…and using a melon baller, extract the seeds:

There, not perfect but you can see that this sort of method retains a lot more of the apple flesh than the big “v” cut you’d normally make with a knife.

The top looks better.

Left whole or sliced, an apple that looks like this says “apple” more clearly than one that’s been whittled down by conventional means.

Filed under:  Apple Peeling and Coring, Pastry | 4 Comments

How to Truss a Chicken

Trussing a chicken is an easy thing to do and it vastly improves the texture of your roast. Why? Because the more you can draw any large piece of meat — not just a chicken — into a compact, ball-like shape, the more evenly it will cook. Extremities like legs drastically overcook when they simply stick out there in the oven’s heat. A little twine around the meat prevents all this.

Even just twenty years ago trussing meant more fuss. Cooks used needles to almost surgically draw the cavity shut, so as to enclose the stuffing and prevent basting juices from making it soggy. Now that basting has been largely discredited as a way to achieve a juicy roast, there’s no need to be so fussy. Stuffings themselves have gone largely out of style due to food safety concerns.

But regardless of how you feel about stuffings, it’s never a good idea to let a chicken cavity go to waste. You can at the very least fill it full of items that will enhance the chicken’s flavor. But I’m getting ahead of myself. Begin by rinsing your chicken inside and out, then pat it dry, inside and out. Why take so much time with the drying? Because a wet bird won’t brown as well. Evaporation cools, remember. A coating of oil or butter, on the other hand, will help heat penetrate your bird faster.

Now then, cut a piece of butcher’s twine, about four feet long. Lay the chicken on top of it. You want the twine to run about even with the chicken’s wings.

Now stuff the cavity. I use half an onion, half a lemon, a few cloves of garlic and some herbs. Whatever fits.

To truss, tuck the wings back under the chicken.

Bring the string around under the breast and make half of a square knot.

Pull it tight under the breast bone. Notice how the breast plumps up.

Complete the knot.

Now loop the string around one of the legs and draw it up.

Do the same with the other leg…

…and tie a tight knot. Done! Normally this is the point where you rub on some salt and oil (or just oil if you’ve brined your bird). However for chicken in a salt crust you don’t want to do either. More on that a bit later.

Filed under:  Pastry, Trussing a Chicken | Leave a comment

Stupid Chocolate Tricks I: “Balloon” Cups

Here are a few things that don’t go together: impossibly delicate chocolate molds, outdoor photography and July. Fortunately I made a lot of cups and garnishes. Edible “balloon” cups are nothing new, but still a great way to wow guests at a dinner party. You can make them ahead and store them in the fridge until you’re ready to fill and present them.

Start with the balloons. I like’em small because big balloons make big cups that you have to fill with lots of dessert or ice cream. Little ones are a bit more challenging but work a lot better, especially if they’re filled with rich peanut butter mousse, as these are. Mrs. Pastry calls this dessert “peanut butter cup of the gods”, and it’s hard to disagree.

These little balloons — made for water balloons — can be had in most toy stores.

I only blow them up a little bit.

Dip them in meted chocolate, ideally tempered dark chocolate which will make firmer cups with a nicer “snap” when you bit into them.

Get a nice coat on there, wait a few seconds…

…and dip a second time.

Place them on a parchment-lined sheet. They’ll make their own little “feet.”

Allow them to cool completely, especially if the chocolate is tempered, about an hour. When they’re firm, freeze them for about twenty minutes before handling them.

Remove the balloon by clipping the very ends with scissors. This keeps them from popping and damaging the cups.

The balloons will stick to the interiors of the cups, probably. It can be a little difficult extracting some of them, since the thin, thin cup walls start melting as soon as you touch them. If you have difficult balloons, grasp the cup by the “foot” with the fingers of one hand and peel the ballon out with the the fingers of the other — but just for second or two. If the cup is starting melt and you haven’t fully extracted the balloon, put the cup back in the freezer for a minute or so and have another go.

When you’ve extracted all your balloons you can store the cups in the fridge or on the counter, provided it’s not hot in your kitchen. Fill them at your leisure. I spooned in some peanut butter mousse, then piped a curlicue of mousse on the top. I could have piped it all in but I dunno, I wasn’t thinking clearly.

For the garnish, I used a fork to drizzle some free-form shapes on a parchment sheet at the same time I made the cups. I likewise let them firm, then froze them. I peeled them off when the cups were filled and I was ready to serve, like so:

Easy as pie.

Filed under:  Making Chocolate "Balloon" Cups, Pastry | 13 Comments

Spit-Making 101

All this talk of spit and sloppy drunkenness really is making for a macho week — as advertised. But why does one actually need to make a spit to make a spit cake? Because a normal meat-roasting spit is inadequate to the job. You can’t simply skewer a piece of dough on a stick, hold it over a fire and expect it to bake into anything. It would be too massive and the outside of the dough would burn before the interior baked.

The trick to a spit cake is to expose only thin strips of dough to the flame so that it has a realistic chance of baking all the way through. Sure, you could wrap a tiny amount of dough around a stick, but how much fun would that be? A fat log-like spit allows you to create a cake of a size that’s worth eating. It isn’t difficult to make one. I’ll show you how.

First, select your wood. Here I have an untreated 3 1/2″ pine wood bannister post that I got at a local hardware store. You can use virtually any type of wood for this job, but it MUST be untreated. None of that green, pressure-treated stuff you see at the lumber yard. It’s full of a preservative called alkaline copper quaternary (ACQ) and it’s toxic. If in doubt, ask somebody.

So then, seizing the nearest convenient saw, cut off an 8-or-so-inch piece.

Like so.

Now then locate a power drill and a 3/4″ flat bit like this:

Mark the center of the post and drill a hole about two inches deep. Let me emphasize that the technique shown in this photo is counter-indicated by every power drill manual on the planet. Do not drill this way. Use a proper vise, not your hand to hold the post piece steady. I did it like this because, well, this is frequently how we do things in Kentucky. On which note, yes, that’s the back of my friend’s pickup truck. Drill holes in both ends of the post.

Now then, secure a 3-foot length of 3/4″ dowel rod and cut it in half. Apply some wood glue to the end of one of the halves…

…wipe off the excess…

…and insert Peg A into Hole B.

There, you’re done. Just let it dry. Will it burn when I use it over a fire? I sincerely hope not, but we’ll see.

But what about the hole at the other end? I’ll insert the other half of the dowel into it when it comes time for baking. It’ll be easier to wind the dough on — and take the finished pastry off — if I don’t glue it.

Easy!

NOTE: Had I been thinking this through fully, I’ve have seasoned this spit before I tried making spit cake on it. Wood — even wood that’s been lubricated with oil — does release very well. A liberal covering with oil, then a toasting over a hot fire, would create a seasoning layer on your spit. I plan on doing that, probably twice.

Filed under:  Making a Cake Spit, Pastry | 9 Comments

Poaching Peaches

Fruit poaching is a simple process, and, at least for a fruit as delicate as peach, a quick one as well. Start by making your poaching syrup, a mixture of two parts water and one part sugar by weight. Here I have a pint (pound) of water and 8 ounces of sugar. Bring it to a simmer over medium heat, stirring until the sugar is dissolved. If you feel like it, the seeds from one vanilla bean make a great addition. You’ll have enough syrup to poach half a dozen peaches or so.

Now split your peaches…

…and remove the stones.

Gently scoop out some of the fibrous bits around the stone.

Now’s the time, if you don’t want to poach with the skins on, that you need to blanch the peaches. To do this, you’ll make shallow cuts in the skins here and there, then plunge the halves into simmering water for 30-60 seconds. Once cooled, the skins will peel off fairly easily. I want to leave the skins on for color, so I’m skipping this step.

Gently put the peaches into the simmering syrup. Notice that the syrup isn’t boiling, that’s by design. You want the syrup only hot enough so that you see the odd bubble or two come up every few seconds. Try to ensure that the peaches are completely submerged, especially on the skin side. Let them poach for five minutes.

After five minutes, remove the pan from the heat and let sit another five minutes. Once again, push the peaches under the level of the syrup since they’ll want to float. You’ll notice the skins beginning to fade.

When the poaching period is up, remove the peaches to a shallow dish and pour the warm syrup over them. Allow the dish to cool completely, then refrigerate overnight.

The next day you’ll notice that the skins have started to wrinkle. No worries, the fruit underneath will be lovely. Simply slip the skins off. The flesh will be a soft pinkish-white, ready to use for whatever purpose you wish, like oh say, topping a charlotte. You’ll also have a quantity of peach syrup leftover. Use that as your imagination dictates. Mixed drinks, anyone?

This method is terrific for white peaches, and works for regular yellow peaches as well, though for obvious reasons the colors will be darker. Also, if the peaches are very ripe, you’ll want to poach for a shorter time lest you cook them into mush.

Filed under:  Poached Peaches, Poaching, Techniques | Leave a comment

How to Knead Bread Dough

A few of you have been asking me to put up a basic tutorial on dough kneading for a while, and this seems like a good time. I’m normally a machine guy, I do most of my kneading with a mixer and a dough hook, however there are times when only the personal touch will do. The process is very simple. Starting with your mass of dough…

…you plant the heel of your hand in the middle and push the half that’s furthest away from you even further away:

Fold the elongated mass back down:

Give it a quarter turn:

And do it again:

And that’s all there really is to that!

Filed under:  Kneading Bread Dough, Techniques | 2 Comments

How to Cut a Cake

This is one of those tasks most people assume they already know how to perform. However after receiving some emails about slipping and/or sliding glazes during Sacher torte week, I think a tutorial on this subject is warranted. For indeed as with most things, there’s a right way to cut a cake and a wrong way. Here’s the wrong way…

…which is to say stabbing it in the center from above. (Here the cake is represented by a stack of two upturned cake layer pans). Why is that the wrong way? Because it puts pressure on the center of the cake. I know, you think you have a good sharp knife there, but if the surface of the cake or pastry is at all rigid, the result will be compression which means cracking, slipping or stretching of the top coating. Even in the case of a soft buttercream top, the drag of all that surface area will pull the center of the cake downward, to no good effect. Proper cutting of a cake starts from the outside edge and continues in an arcing motion down to the plate. Allow me to demonstrate.

Start by angling the knife at about 45 degrees relative to the tabletop, and cut inward toward the cake’s center. The very tip of the knife should be the last thing that slips under the surface coating of the cake.

As you reach the middle of the cut, roughly the level of the bottom layer, the knife should be about parallel with the table.

Finishing the cut, you want to land the knife tip at the very center of the cake plate.

Then all you need to do is withdraw the knife, tip still down on the plate:

Done! Dip the knife in a nearby bowl of warm water…

…wipe it…

…and you’re ready for the next cut. Easy.

Filed under:  Cutting a Cake, Techniques | 2 Comments

How to “Un-Seize” Chocolate

You know how it goes. One minute you’re happily stirring a batch of melted chocolate, dum dee dum dum…

…and all of a sudden it starts to darken and thicken mysteriously. What the…? It seems to shrink in volume and looks oddly greasy.

Then in a few seconds it’s seized up into a thick, putty-like chocolate goo.

What caused this? The answer of course: a small quantity of water somehow got into the bowl. Typically this sort of thing happens when chocolate is being melted over a double boiler, and water vapor or drops of condensation find their way into the pan. It’s just one of the reasons I prefer a microwave. Can anything be done about this?

Yes indeed. More heat? Nope, the chocolate’s already melted, even though at the moment it doesn’t look that way. More heat will only burn it. The answer is more water. Are you kidding, Joe? It’s water that got me into this mess!

That’s true. A small amount of water caused the problem. A larger quantity of water will solve it by creating more syrup and allowing the molten chocolate mixture to flow again. So we just add perhaps a spoonful or so of hot water…

…stir, and a few moments later we’re pretty much back to where we were. Pretty much. The chocolate has some water in it now, so it’s not so good for something like tempering. However it’s perfectly good for ganache, a flourless chocolate cake, or any of a thousand other uses.

Whew! That was a close one…

Filed under:  Techniques, Un-"Seizing" Chocolate | 3 Comments