
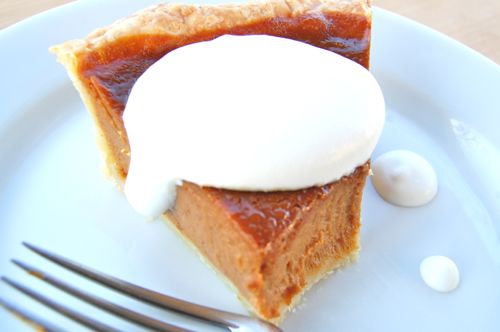
That’s how I like a slice of pumpkin pie: well lathered in semi-whipped cream. Pumpkin is my favorite pie by a Kentucky mile. The fact that it’s relatively low in calories and packed with nourishment only makes it easier for me to rationalize a second or third piece.
Pumpkin has always been one of the easier pies to make: roll the shell, mix the filling, pour the filling and bake. Here I’m complicating matters a bit, but the payoff is big, so please indulge me. Hm. Ever notice how I like to simplify the complicated and complicate the simple? Something I’m just starting to learn about myself. But let’s continue.
Prepare your pie dough according to these directions. When you’re ready to shape, roll it and rest it according to these other directions (though this obviously isn’t a double-crust pie). When that’s done you should have a rested-and-ready pie shell, all set for pre-baking:

When you’re ready to pre-bake, preheat your oven to 375. Then gently press some tin foil into the dough-lined pie pan. This is where one of those extra-wide rolls of foil really comes in handy. Make sure to gently curl it around the rim to protect the edges of the crust.

Now pour in whatever sort of weights you want. I use loose change, myself. Yes I know it’s dirty, but I’ve never met a germ that can drill through a sheet of heavy-duty tin foil. If you have call the CDC immediately because we’re all doomed.

While the crust is baking get your filling together. Combine the pumpkin, sugar, salt and spices in the bowl of a food processor and give it a spin for about 45 seconds. This really creates a silky texture.

Scrape the mixture into a saucepan…

…pour in the milk and cream…

…and whisk the whole thing together. Like that groovy Trudeau whisk? I never thought I’d fall in love with a silicone whisk, but now I can’t put it down. And in answer to your question, yes, they sent me that as a gift. That’s partly why I’m saying nice things about it. Send me something nifty and I’ll say something nice about you, too. The Joe Pastry Receiving Department never closes.

Put the filling on the stove over medium-high heat. In a few minutes it’ll start bubbling like volcano lava. Whisk it for about 30 seconds and remove it from the heat lest it cover your stove top with goo. When the crust has baked about 25 minutes, remove it from the oven and gently lift out the foil and the change (the edges of the foil will cool almost instantly). Return the shell to the oven to bake another 5-7 minutes until it’s just barely browned (it may puff up a little, don’t worry, it’ll settle back down).

After about four minutes, return the filling to the heat. When the finished shell comes out of the oven, set it on the stove top. The filling should be bubbling again. Turn off the heat, add the eggs…

…and whisk it good.

Promptly pour the filling to the shell. What’s the deal about a hot filling and a hot crust? Because that speeds the setting of the eggs — if all goes perfectly it starts to happen right when the filling and shell come into contact — and that helps keep moisture from soaking into the bottom crust. But I digress.

You may have some left. Part of the reason is because there’s air in the filling from all the processing. Usually the filling in the shell will settle after about ten minutes. At that point you can reach into the oven an pour some of this on. Or not. It’s up to you. Apply a crust protector to the pie and bake about another 20-25 minutes unit the filling doesn’t slosh but jiggles when you jostle the pan.

Why do I love crust protectors?

Because they prevent crusts — especially pre-baked crusts — from over-baking. See?

Let the pie cool for at least an hour before slicing and serving. Warm pumpkin pie is one of those little slices of heaven we all hear so much about. But I love it cold as well. After an overnight rest the flavors mellow to perfection. You can store the finished pie at room temperature for a day or so, in the refrigerator after that.