
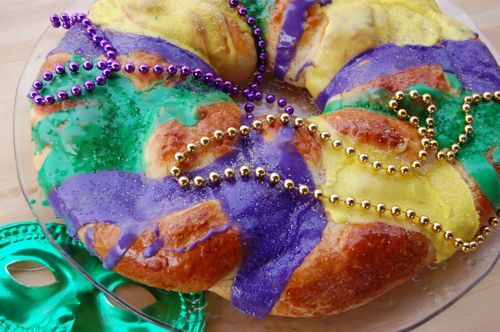
Though certainly not as refined as their continental cousins, king cakes are sweet, garish pleasures. I confess I was surprised at how good this recipe was. Having eaten nothing but dried out mail-order king cakes for years, this one was tender and delicious. The liquid butter yields a slightly denser crumb than a traditional brioche dough would, though I’d still be interested to try this using my standard brioche dough, since I think that would amp up both the color and the flavor (of the interior). Still there’s no beating this recipe for maximum return on a minimum investment of time and effort. Begin by sifting your flour into the bowl of your mixer:

Add in all your dry ingredients and stir with the beater (paddle) to distribute them.

Whisk together the wet ingredients and melted butter…

…then add to the dry ingredients.

Stir until everything is moistened, then switch to the dough hook.

Knead for about 8 minutes until the dough comes together in a slightly sticky ball. If it’s too sticky, add a little more flour, but remember that the finished dough will be slack and greasy no matter what.

Scrape it into a oiled bowl, cover it with plastic and let it rise for about an hour.

It will be roughly doubled in size.

Turn it out onto a well-floured surface…

…and roll.

You want the piece to be about 18″ long by about 12″ wide.

Apply the cinnamon sugar.

Then with a pizza cutter, slice the dough sheet long ways into 4″ strips. If you don’t want to have to worry about braiding your king cake, you can just roll the whole thing up (long-ways) if you prefer.

Fold the pieces over on themselves…

…and pinch them shut. Here I should say that cinnamon sugar isn’t your only filling option here. A thin stripe of pastry cream or frangipane can be spread down the middle of each strip, then enclosed. Some people use cream cheese, but I’d discourage that unless you were using a sweetened cream cheese filling à la cheese Danishes. I’m told cheese and cherries are popular. Oh, and did I mention that this is the time to add your dried fava bean or little plastic baby?

Once the strips are ready, squeeze the ends together…

…and braid them. Gents, ask a woman in your life to help you with this part if you don’t know how, it’s really pretty easy.

Bring the ends around to form a circle and squeeze the ends together. I’m not a great braider as you can see, but an imperfect braid will still make a lovely cake.

Slip the cake onto a piece of parchment and the piece of parchment onto the back of a sheet pan or a cookie sheet without a lip. Why? Because the cake ends up being bigger that the pan when it’s baked and you need to give it room to expand. Now paint the cake with egg wash and proof it for about an hour until it’s puffy.

Meanwhile, preheat your oven to 350. Once the cake has proofed you have a couple of options. You can either put the cake into the oven on the pan or cookie sheet, or, if you have a pizza stone in your oven (I always do) you can slip the cake off the pan and bake it directly on the stone. For a cake this big I prefer the latter method. The idea in a nutshell is to insert the pan almost all the way into the oven with the cake and parchment still on it, tip the pan forward slightly so the far edge of the pan is touching the far edge of the stone, and then with a slight jerk, pull the pan out, allowing the cake and parchment sheet to drop onto the stone. You can practice this with a cold oven using a loaf of baked bread or some towels. It’s a very easy trick to master. Also, you can just make a smaller king cake.
Brush it with more egg wash before it goes in. Bake for 20 minutes, rotate the pan, and bake about another 15 until it looks about like this. Sort of ugly, yes? But that’s what happens when you bake up a very yeasty, quick-raised bread. You get lots of expansion. The newly exposed areas don’t have egg wash on them, which means they don’t brown very well. But that’s why God created icing.

While the cake is cooling on a rack, make your icing and color the various batches yellow, green and purple. When you’re ready to ice, pull out the parchment sheet, then start icing with your lightest color, the yellow. Don’t be bashful, just dump it on there and let it run:

Before it sets up, sprinkle on some colored sugar. I do like-with-like, but then I’m uptight.

Now the green…

…and sugar…

…and finally the purple (and sugar).

The colors will set up in about ten minutes, after which you can move the cake, gently, to a large platter and decorate as you wish.

Laissez le bon temps rouler!