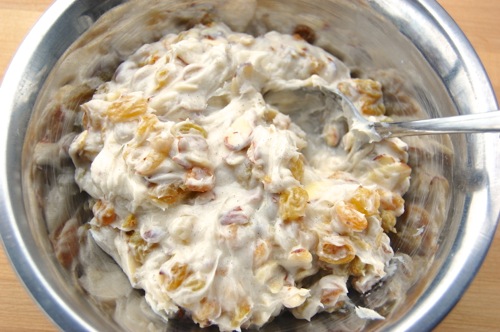
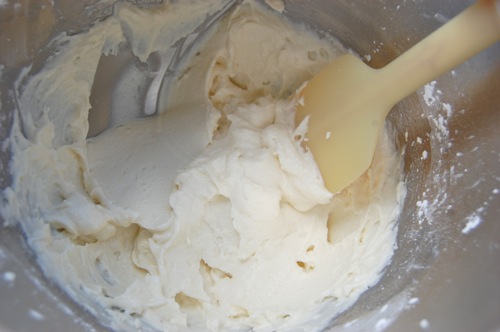
Category Archives: Fillings

Chocolate Chantilly Cream

Think of chocolate Chantilly cream as a really thin ganache — whipped. Yes, you can make chocolate Chantilly cream with cocoa instead, however the cocoa butter in the chocolate makes a nice stabilizer, helping the whipped cream hold its shape. If you wish to supplement the real chocolate with more cocoa powder to boost the chocolate flavor, you can.

Begin by combining a cup of heavy cream with about two ounces of chocolate. These are 70% chips, but just about any chocolate will do.

Zap the mixture in the microwave for about 30 seconds on high and stir, then use as many more zaps of 15 seconds as you need to melt the chocolate completely (stir between each). The mixture will start out looking grainy…

…then smooth out as you re-establish your emulsion. Be advised, the darker the chocolate the more you’ll need to blend the mixture to avoid flecks. I got some as you can see above, but they were small enough that I really didn’t mind them. Use a stick blender to get a perfectly smooth emulsion. Refrigerate the mixture for about 4 hours until it’s quite chilly.

Pour the whole thing into the bowl a mixer fitted with a whip.

And whip to soft or stiff peaks, whichever you prefer. If you want to sweeten the cream along the way, you can do that as well.

Filed under:  Chantilly Cream (Chocolate), Chocolate Chantilly Cream | 24 Comments

Making Diplomat Cream

Diplomat cream is what you use when you want the flavor of pastry cream but in a lighter, fluffier package. It makes an outstanding filling for all sorts of things that aren’t baked afterward (or are only finished in the oven or broiler, like brioche polonaise). The whipped cream it contains can’t take heat.

I know what you’re thinking: just how much whipped cream is in this, Joe? Well that’s up to you. Diplomat cream can be as light as 1-1 pastry cream to whipped cream. My ideal is 2-1 pastry cream to whipped cream. But you can go heavier or lighter as you see fit. I generally go with a less-sweet pastry cream and a slightly sweetened whipped cream, so the overall effect isn’t too sweet. If both components are just barely sweet enough, the finished product will be about perfect. Put the two in a bowl:

Fold gently together.

And bingo, you’re done! Use it right away.

Filed under:  Diplomat Cream, Diplomat Cream, Pastry | 2 Comments

Making Chocolate Filling

Bake-in chocolate fillings are strange animals because no matter what you do the chocolate is going to seize and go grainy, at least to some extent. Bar chocolate, chocolate sticks, ganache, chocolate chips, chocolate pastry cream…none of them will be the same after all that high oven heat. Which means a bake-in chocolate filling will never be creamy. Assuming you can accept that, and I have a feeling you can, proceed.

You’ll want to use a dark chocolate since that will bring the most chocolate flavor to the party. Start by chopping it as finely as you reasonably can. There’s nothing wrong with a few larger chunks in there.

Next combine the sugar and cinnamon. Why the sugar when chocolate is so delicious by itself? Because fillings are like sauces, they’re meant to add flavor to something larger than themselves. Thus their flavor profile often needs to be exaggerated. But on we go…

Add the butter and stir.

Then pour in the chopped chocolate. Stir thoroughly and it’s ready to use.

Filed under:  Chocolate Filling, Pastry | 7 Comments

Chocolate Filling

I can see the demand for chocolate kringle is high enough that I need to take some action here! Also I don’t have a bake-in chocolate filling on the site anywhere. The time is now! This is basically a chocolate rugelach filling, but use it however you see fit!

6-7 ounces (about a cup) cup finely chopped dark chocolate
4.5 ounces (2/3 cup) granulated sugar
1 teaspoon cinnamon
3 tablespoons melted butter, cooled

Stir together the butter, sugar and cinnamon, then stir in the chocolate. Alternately you can chop everything up together in a food processor. Me, I’d rather not get the machine dirty if I don’t have to!

Filed under:  Chocolate Filling, Pastry | 10 Comments

Making Raisin Filling

The method for this extremely sweet, ultra-aromatic filling is a little unorthodox, but if you can suffer through a little stirring, it’s a snap. Start by rehydrating your raisins. Place them in a microwave-safe bowl and pour in water to cover. Zap them for 3-4 minutes until the water boils, then set them aside for half an hour. This, by the way, is a great technique anytime you want to add raisins that can actually be chewed easily to a filling.

While the raisins are steeping, beat the soft butter in a bowl, add the cardamom and beat everything together.

Add the warm cream and repeat.

Next comes the powdered sugar. Stir it in steadily. This mixture will be very stiff at first, but will shortly come together into a paste.

The paste will loosen up quite a bit when you finally add the drained raisins. In fact, since just a little water really loosens up anything that has powdered sugar in it, it’s a good idea to press the raisins while they’re in the strainer to get out as much residual moisture as you can. Add them in along with the chopped nuts and you’re ready to go!

Filed under:  Raisin Filling | 4 Comments

Raisin Filling Recipe

This filling is great for kringle, but also a lot of other things. I love cardamom and raisins together. Talk about a classic Scandinavian flavor, this is it!

1 cup golden raisins
4 ounces (1/2 cup) very soft butter
1 teaspoon ground cardamom
2 tablespoons cream, warm
8 ounces (2 cups) powdered sugar
1/2 cup chopped almonds

Place the raisin in a small microwave-safe bowl with water to cover. Zap on high for 3-4 minutes until the water is close to boiling. Let the raisins steep for half and hour, then drain. Meanwhile, in a medium bowl, beat together the butter and cardamom. Stir in the warm cream, then stir in the sugar steadily. Last, add the raisins and almonds.

Filed under:  Pastry, Raisin Filling | 14 Comments

Making Ricotta Cream

For those who aren’t big fans of cream cheese fillings or frostings (I’m one of those), ricotta cream is a terrific alternative. It’s lighter and fresher tasting, especially when you make it with homemade ricotta. Yet it’s utterly delicious. Served with some sort of crisp cookie garnish, it makes a dessert all by itself. And of course it’s the classic filling for cannoli. Start by placing the ricotta in the bowl of a mixer fitted with a paddle (you can do this by hand if you’d rather).

Beat it up for about three minutes until it’s creamy looking.

Add the powdered sugar and beat that in for about 30 seconds.

Scrape the bowl and add the vanilla.

Beat it another 10-15 seconds until it’s like so.

Lastly fold in any inclusions you like (mini chocolate chips or bits of candied citrus rind are the classics).

Done! Now where’s that spoon…

Filed under:  Pastry, Ricotta Cream, Ricotta Cream | 6 Comments

Ricotta Cream

This recipe is adapted from Grace Massa Langlois’ new book, Grace’s Sweet Life. If you haven’t been to her blog of the same name, I highly recommend that you visit. It’s a treasure trove of Italian and Italian-inspired bakery. Ricotta cream can be used as a filling for all sorts of things, but is most commonly seen piped into cannoli. You’ll need:

1 lb. 6 ounces (3 cups) fresh ricotta cheese, drained overnight
6 ounces (1 1/3 cups) confectioner’s sugar
1 1/2 teaspoons vanilla extract
1.75 ounces (1/3 cup) finely diced candied citron or orange peel (optional)
2.75 ounces (1/3 cup) miniature semisweet chocolate chips

Put the cheese in the bowl of a stand mixer fitted with the paddle. Beat until smooth, about 2 to 3 minutes. Add the confectioner’s sugar and beat until fluffy and smooth, about 4 minutes. Stir in the candied peel or chocolate ships if using. Transfer the filling to an airtight container and refrigerate it until you’re ready to use it.

Filed under:  Pastry, Ricotta Cream, Ricotta Cream | 4 Comments

Making Stabilized Whipped Cream

Sure, there are plenty of purists out there who don’t believe cream should be adulterated with stabilizers. I’m with them…some of the time. The rest of the time I’m worried about my whipped cream holding up for long periods, on warm days or in the freezer. Then I’m looking for a little somethin’-somethin’ to help me get by.

That something is gelatin. Just a little will do wonders for your whipped cream’s stability, and honestly, it barely impacts the taste or texture. Start by melting a little gelatin. For 2 cups of cream you’ll start with a 1 teaspoon of powdered gelatin and a little ice water. Yes, these are my little silicone Trudeau bowls again. I love them, that’s why I plug them. They’re wonderful:

Pour about two tablespoons of the ice water into the gelatin and let it sit for five minutes (no stirring).

What you’re doing here is creating a little protein gel. See?

To use it you need to melt it. Zap your little silicone Trudeau bowl — if you have one — in the microwave. Use short full-power bursts of 5 seconds. That should be all you need to liquify it.

With that in hand, whip 2 cups cream.

Partially. Get it part-way thickened, then add your sugar…about 1/4 cup for this much cream.

Whip it for another ten seconds, than add any flavoring you want. Here I’m putting in about 3 tablespoons of espresso syrup.

Whip another ten seconds (you’ll probably be getting close to soft peaks by now) and pour in the melted gelatin.

Whip the cream the rest of the way, somewhere between soft and stiff peaks, according to your liking.

You’ll need to use this within about half an hour, which is when the gelatin will start setting up, making smooth spreading more difficult. Consume any leftovers on scones.

Filed under:  Pastry, Stabilized Whipped Cream, Stabilized Whipped Cream, Stabilized Whipped Cream | 18 Comments

Prune Filling

Another fantastic kolache filling that works just as well in Danishes. Funny how that works, isn’t it? You need:

2 cups dried prunes
water or prune juice to cover
2 tablespoons sugar
1 tablespoon lemon juice
zest of 1/2 lemon
1/2 teaspoon ground cinnamon
pinch ground cloves

Place the prunes in a small saucepan and add water or prune juice to not-quite cover. Bring the mixture the boil, turn off the heat and let stand for 20 minutes. Cool the prunes and remove any pits. Here I’m working a half quantity.

Remove the prunes to a food processor. Add the remaining ingredients and blend to a slightly chunky paste.

Done!

Filed under:  Pastry, Prune Filling | 9 Comments