
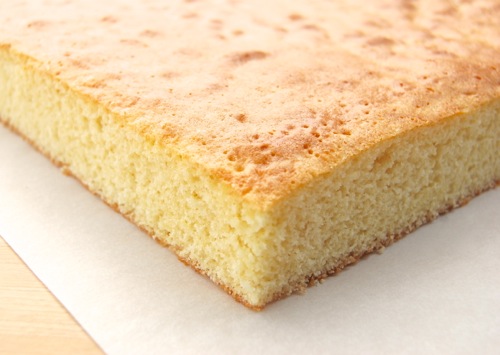
Sheet cake lovers, this is your cake. It’s as close as you can get to a commercial sheet cake consistency without the high ratio flour and emulsified shortening that the pros use. It’s great for stacking and decent for carving (though if you really want to get serious about cake theatrics you’ll want to do a google search for “durable cake recipe”). But of course the main reason people like a sheet cake is for the decorating potential. Quite a canvas they present, oh yes they do.
This recipe is formulated for a 9″ x 13″ x 2″ cake pan, and I can’t stress enough that if you want to make a sheet cake you need to use a square-cornered sheet cake pan. Not a casserole dish, which creates mounds at the edges of the cake with a depression in the center. Start by preheating your oven to 350 degrees Fahrenheit and getting your ingredients together. Grease your pan and line it with parchment paper for easy extraction.

Next sift the flour into a large bowl.

Add HALF the sugar, the baking powder and salt…

…and whisk it all together. Set it aside.

Next combine the room-temperature milk, vanilla and vegetable oil. Set that aside as well.

Now combine the shortening with the rest of the sugar.

Beat that on medium high for 2-3 minutes until it’s very light and fluffy (this step is key to a good emulsion so you may want to scrape at least once as you do the creaming). Now start adding the eggs one by one, as well as the yolks. Scrape several times to make sure you’ve got complete incorporation. If the mixture looks lumpy or curdled, proceed since it’s no big deal. At all.

Now add a third of the flour, stir on medium-low, scrape and stir some more.

Add half the milk mixture and stir that in. Add another third of the flour, stir, scrape and all that. Proceed like this until everything is combined and the batter is smooth, but don’t go too nuts on the beating (gluten development, donchaknow). You just want everything evenly combined.

Scrape the batter into your prepared pan and bake 30-40 minutes until the center of the cake springs back when it’s tapped.

Allow the cake to cool ten minutes before you turn it out. Place a rack on the top and flip the whole works over. Put another rack on the cake and flip it back, removing the original rack when you’re done. Let it cool completely before you trim and decorate.
Alternately you can do reader Frank’s trick of just leaving the cake upside-down and enjoy that nice smooth top and the square corners!