
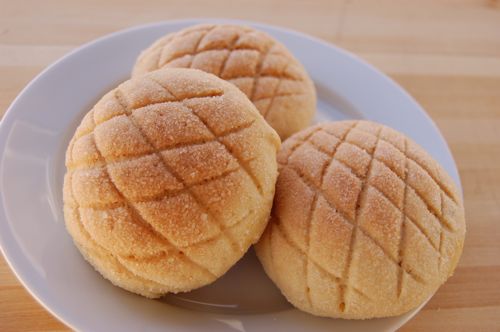
For a first attempt at melon pan, I was pretty pleased with these. Little 4-year-old Joan Pastry certainly was. Judging by her level of enthusiasm I’ll be making these quite a bit in future. But a very interesting item melon pan is. It’s not terribly sweet, nor does it have an especially pronounced flavor. However the textures are extremely interesting, and that jibes with what I know of Japan. Food lovers there are every bit as excited by texture as they are by flavor, perhaps even more so. Begin your melon by preparing the cookie dough. Put the butter and sugar in the bowl of a mixer fitted with a paddle (beater):

Meanwhile, sift the rest of the ingredients into a bowl.

Lightly beat the eggs…

…and add the vanilla to them.

Add the eggs to the butter and sugar mixture in two additions, scraping the bowl as necessary.

The mixture may look a little rough and lumpy, but proceed undeterred. Steadily sprinkle in the flour mixture and beat on medium-low to combine.

At first you’ll worry that something’s wrong, because you’ll get this shaggy-looking dough. Keep going.

After a couple of minutes something resembling a cookie dough will form. Add the lemon zest to it and stir about 20 seconds more to incorporate it.

Turn the dough out on a board and roll it gently…

…into a log about 16 inches long. Wrap it in plastic and put it in the refrigerator.

Next, prepare the buns. Clean the mixer bowl and combine all the dry ingredients in it, then affix the paddle (beater).

Stir the mixture to combine everything, then turn the speed up to medium and add the water.

When the dough comes together into a mass, switch to the hook.

Knead for about five minutes on medium, you’ll notice the dough getting quite a bit smoother. Add the butter and knead to incorporate. It might take a bit longer than you hope, since the butter will cause the dough to slip around the inside of the bowl for a while. Continue until the sides of the bowl are once again clean. The dough will be very soft and slightly greasy.

Put it in a lightly oiled bowl and cover it with plastic wrap.

Let it rise about an hour until it’s about twice its original volume.

To shape, divide the dough up into ten or twelve pieces about 1.75 ounces each.

Roll them into balls on a wooden board or counter top, you may not need any flour at all. (I can very easily imagine inserting a few chocolate chips or some other small quantity of filling into the center of the dough at this point).

Set them aside and a parchment-lined sheet pan.

Now for the dough wrappers. Cut a piece of dough off the log (which you will have taken out of the refrigerator, obviously). I found that I prefer a slightly smaller amount of dough, about 1.25 ounces. But you can use up to two ounces per bun if you wish.

Roll it into a ball and put the ball between two sheets of plastic. Thicker plastic is easier to work with. Here I’ve opened up a Ziploc with scissors.

Now apply a sturdy object to the ball — a small saucepan was handy for me — and press it.

And here’s what you’ll have.

You may need to apply your pin to get the circle a little thinner.

Now then, place a dough ball in your hand…

…and place the dough circle on top.

Bring your other hand over and gently stretch the dough down over the ball. Rotate the ball slowly from beneath as you continue to tuck the dough around the bottom of the ball. (Notice my other hand makes a special guest appearance here thanks to a contract waiver from Warner Brothers).

You want to leave the bottom open a little to allow for dough expansion. I didn’t do this one very neatly. Oh well.

Now then, with a chef’s knife score the top using a gentle see-saw motion, rolling the knife over the bun. First in one direction…

…then the other. Try not to open a vein. Actually, something duller like a bench scraper will work just fine too, come to think of it.

Holding the bun by the bottom (it’s OK to pinch the dough), roll the top from side to side in some granulated sugar…

…and place it back on the lined pan.

There, not too hard, was it? Let these proof for about 45 minutes to an hour. Meanwhile, preheat your oven to 375. Bake on the middle rack for about 20 minutes until lightly browned on the top. Eat warm, because they’re fantastic that way. Here’s what they look like on the inside, light and fluffy surrounded by a crispy cookie shell:

Delicious.