I confess the idea of using a starter for these was tempting. I found a few notes here and there on some recipe boards to the effect that a starter would be “traditional” for bialys. I’m inclined to dispute that. Bialys were invented in Bialystok, Poland around the year 1880. Which means they are by any definition a “modern”, “city” bread, made with the packaged brewer’s yeast that would have been commonly available at the time. Considering how much the Poles have always loved light, fluffy, fast-rising breads I think the odds of bialys being sponge-raised are remote. Still I’m not stickler for authenticity. Some of dough or starter would work well here. Substitute either for up to 1/3 of the dough, making sure the 50% hydration ratio is retained, and making sure you use high gluten or bread flour for either preferment.
2 cups (10 ounces) high-gluten or bread flour
1/2 teaspoon instant yeast
1 teaspoon salt
5 ounces (2/3 cup minus a teaspoon) water at room temperature
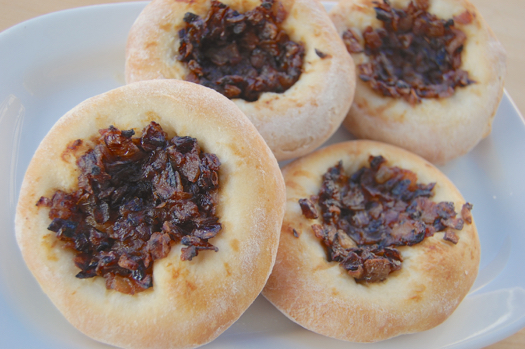
1/2 recipe caramelized onions, chopped
READ ON