Making Esterházy Torte
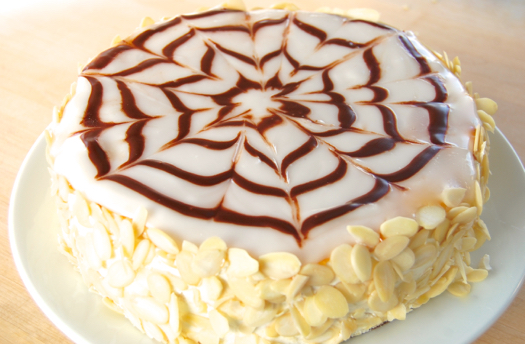
The combination of thin meringue layers and buttercream has been so cherished in Europe for so long that there’s even a special word for it: dacquoise. Which in French means ah, sweet mystery of life at last I found you. Top eleven layers of dacquoise with a smear of apricot glaze, then ice the whole works with chocolate-striped vanilla fondant and you have one of the all-time classics of Viennese pastry: Esterházy torte.
This one is a little complicated to make, I’ll be honest. However if you do like I always do with complex pastries — make a component or two each day for several days leading up to the build — it’s by no means insurmountable. Let me show you how it’s done.
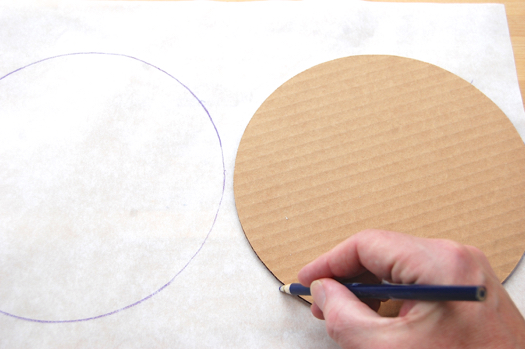
First make your layer templates. Most recipes for this torte call for 9″ or 10″ layers. In this case I’ve reduced the layer size to 8″ which not only produces slightly thicker layers and a taller overall torte, it allows you to bake them two-up on a single piece of parchment paper, which means you can bake them up in half the time, before the batter has a chance to deflate. So using an 8″ cardboard cake round or small pan lid, trace two circles side-by-side on a sheet of parchment.
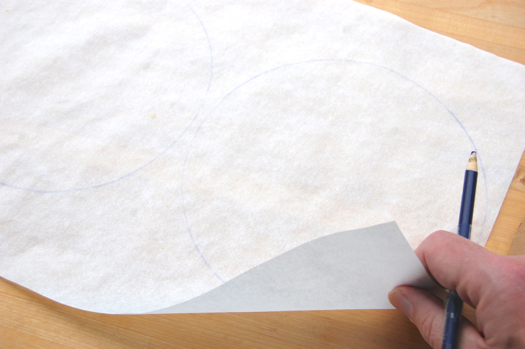
And if you’re concerned the lines will introduce graphite into your layers, rest assured you can just turn the sheet over. See? The lines are still visible.
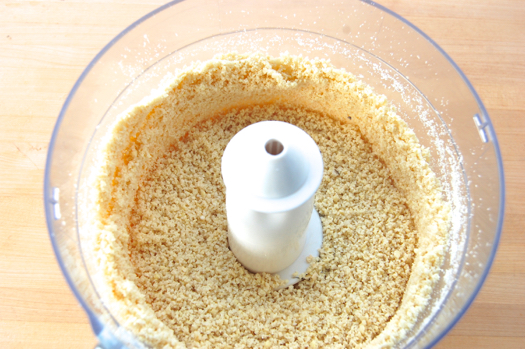
Once that’s done tend to your batter. Preheat your oven to 400 degrees Fahrenheit. Put your almonds or hazelnuts into the bowl of a food processor…

…and chop them finely. After about 30 seconds they’ll be about as small as they’ll get. When they start creeping up the sides you’re just about done. Don’t go much further because you don’t want nut butter, get me?
Once that’s done whip up your meringue. Place the whites in the bowl of a mixer fitted with a whip and whip them on medium-high until they’re frothy. At that point add the vanilla.

With the machine running on low, add the sugar in a steady stream.

Crank the speed back up to medium-high and whip to the “bird’s beak” stage.

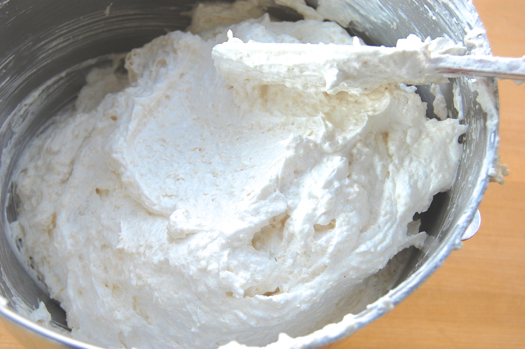
Add the finely chopped nuts and fold those in.
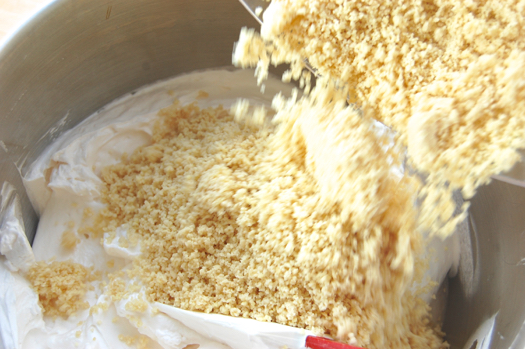
Ready!
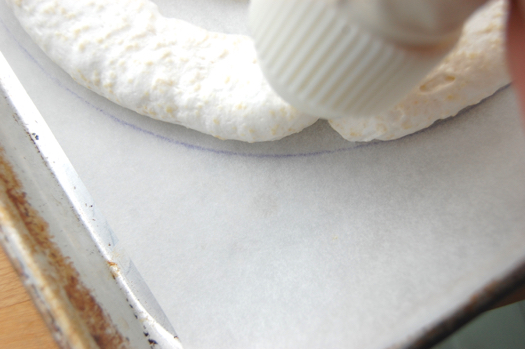
At this point there are a couple of ways you can go. You can simply spread the batter around on the parchment circles or pipe it in. I prefer piping — or at least partial piping — because it makes it easier to do a near-perfect circle. I use a large collar (no tip) and bag…

…and I just follow the line.
When my circle is done I just sorta plop a bunch in the middle. Why not make a perfect spiral? Because that would give me an overly-thick layer. So I leave some space in there…
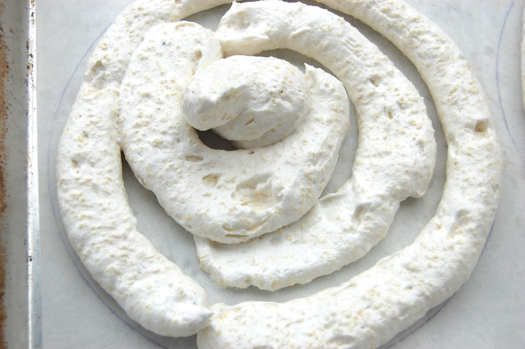
…and spread it around until I have a layer that’s a little more than a quarter inch thick.

About like so.
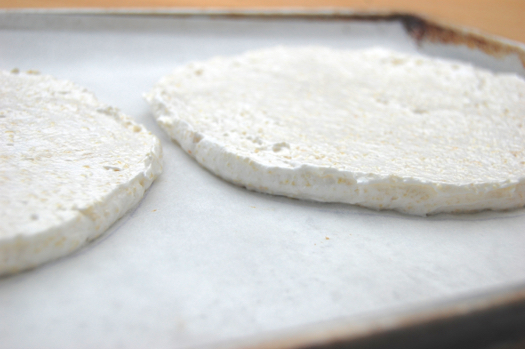
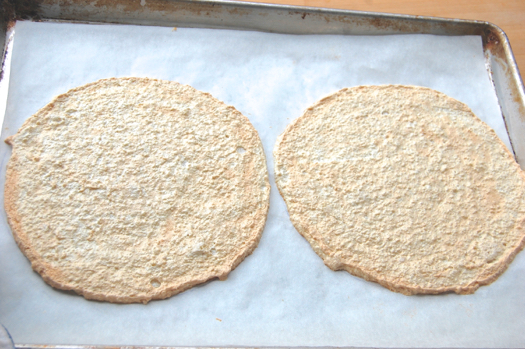
You want a total of six layers. I recommend baking two sheets pans (4 layers) the first time and the last two layers in a separate bake. Why only two pans and not three? Because you want to bake in the middle of the oven, not the bottom (which is too cool) or the top (too hot). Using the two middle racks gives the most even bake. And since the layers only take 8-12 minutes to finish the remaining batter won’t have much time to lose volume. Bake them, switching them top-to-bottom after the first 8 minutes, until they’re lightly golden. Allow them to cool completely, then freeze them if you’re doing them ahead (which I recommend). They’ll puff up in the oven but as they cool they’ll flatten out considerably. Be not afraid.
My suggestion is to make everything except for the buttercream in advance. Why save the buttercream for assembly day? Because it’ll be at its lightest and fluffiest right after it’s made which will make it easier to spread.
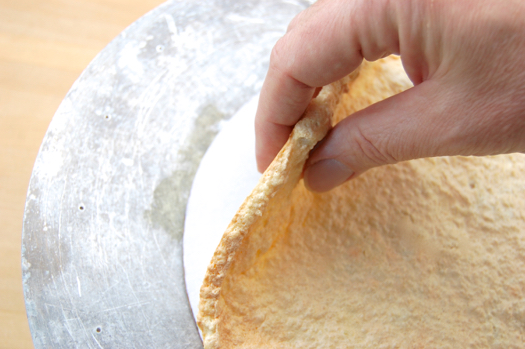
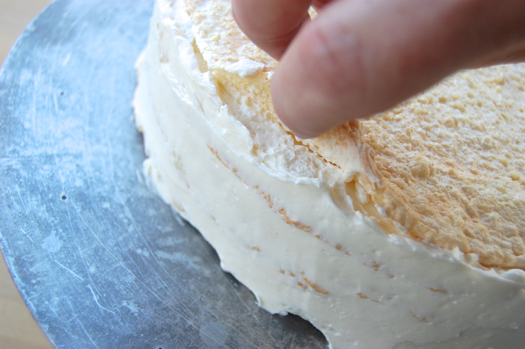
When you’re ready to build remove the layers from the freezer. Turn them over on another parchment sheet and gently peel the paper off the backs. Do it slowly so as to lose as little of the meringue as possible. Place your first layer on an 8″ cake circle with the wax side up.
If you have a cake wheel, now’s a good time to put it to use. If not, no worries. You’ll be rotating the circle a fair amount but that’s no big deal.
You’ll want to apply very thin layers of buttercream, practically scrapings. The thing you want to pay attention to is the outer edges. Any time you’re putting frosting on a cake the tendency is to heap it up in the middle, the result being a domed top. With an Esterházy torte you want to take extra cake to make sure it’s flat when you finish, for reasons that will be more apparent later.
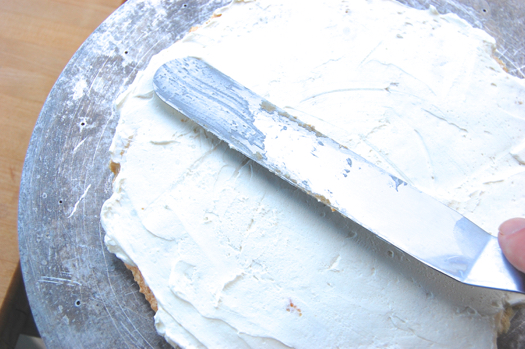
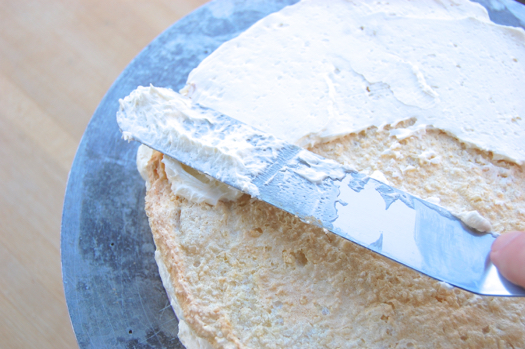
It helps to apply the buttercream in a large dollop out near the edge…
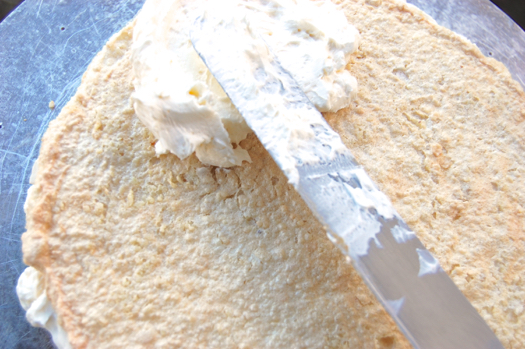
…then spread it along the edge. Cover the center last. Get a little exacting as you add on each layer, eyeballing it along the edge, making sure each one is as flat and even as you can reasonably make it without stressing about it. Building pastry is fun when you’re paying attention to details. It’s not when you’re getting all sweaty and freaky, knowadimean?
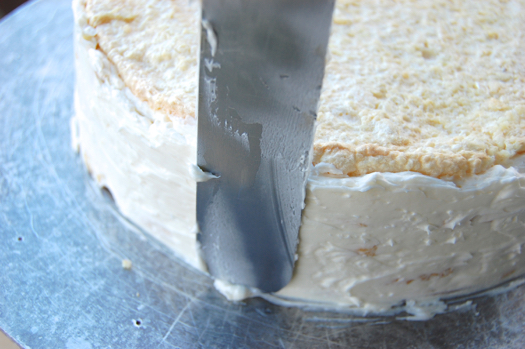
When you get all the way to the top, smooth the sides. Oh, I should add that it’s not unusual for a layer to tear or even break during the build. If one does fall apart in your hands just stick the pieces on and carefully apply the buttercream to them. No one will ever, ever know.
If the top is uneven on the edges just pick up the top layer and stuff a little more buttercream under there like you’re sweeping dust under a rug. What? Like you’ve never done that. Sure. Tell me another one.
So OK, once the top is as flat as you can get it, apply the apricot glaze in a thin layer. Not too much now. We just want a taste of it, and you’ve got one more layer to go!

Put the whole thing in the freezer to firm while you contemplate the final step. It’s a little stressful, I won’t mince words here. The trick is getting the fondant to the right consistency so that it spreads but doesn’t run off the edges. Remember the whole “flat” thing? Now you know why.
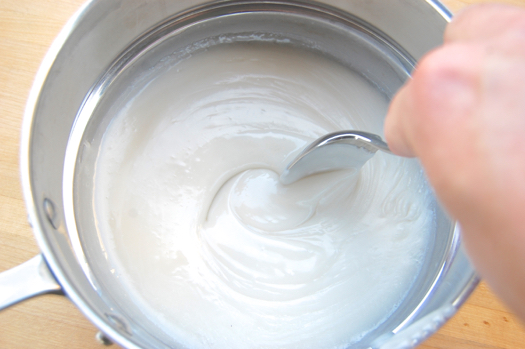
So then, for the fondant. You’re going to melt it in a double boiler but you’re not going to apply it warm. That would melt the apricot glaze, right? Then everything would run off the torte in a sloppy mess. So you’re going to melt it but then let it cool to room temperature.
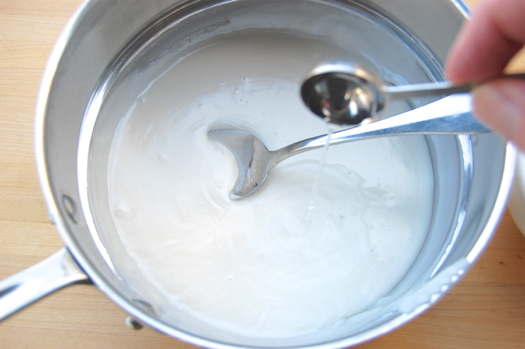
I can already hear you saying: but Joe, if it cools back to room temperature won’t it just firm up again? Left to its own devices it will, yes. But we’re going to add a little water while it’s warm to keep it loose. We’re adding very, very little because as anyone who’s ever made simple icing can tell you, a little water can moisten a whole lot of sugar. I find that 3 1/2 teaspoons is about perfect for 1 batch (about 20 ounces) of poured fondant.
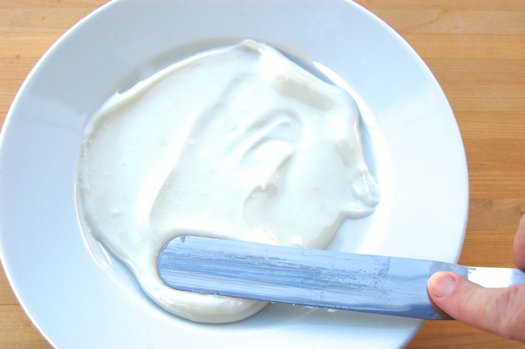
After the water has been added to the melted fondant, stir it while it cools down. When the fondant feels almost completely non-warm, you might consider doing a dry run of your topping on a plate or other flat surface. Pour on about a cup of your diluted fondant.
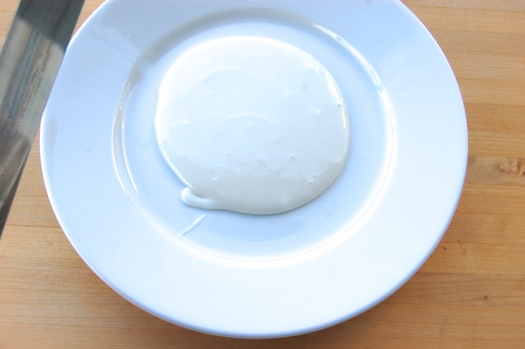
Spread it around with an icing spatula. At this point you might be thinking: dang! This fondant is too thick! I can see ridges after I spread it! But just wait ten seconds. The fondant will slowly settle to a smooth layer with rounded edges, at which point it’s ready for the melted chocolate or ganache.
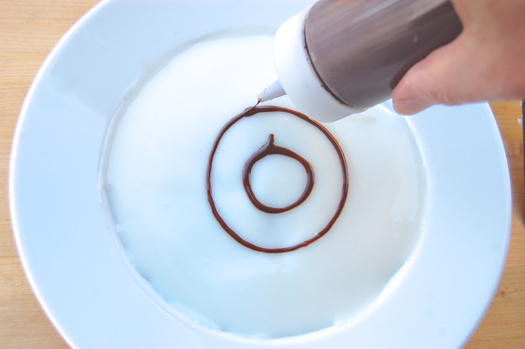
I keep mine warm in a squeeze bottle that I have sitting in a pan of warm water. Before I use it I take the top off and give it a stir with a butter knife. It should squeeze out in liquid form. So then, I make some concentrical circles. If I flub the circles I don’t sweat it because that’s why God invented toothpicks.
I drag one through the mistake and no one’s the wiser. Outward…
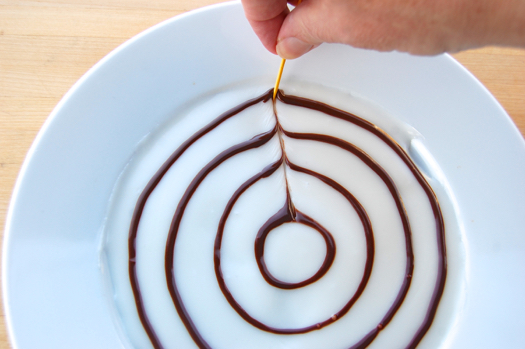
…inward…
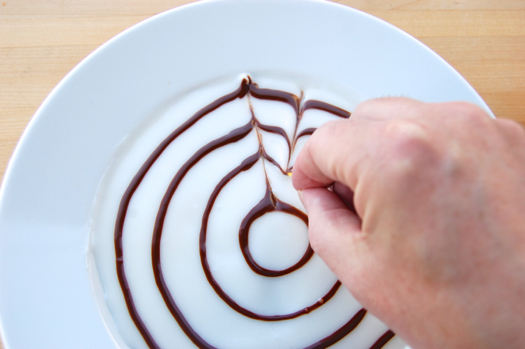
…outward and so on…
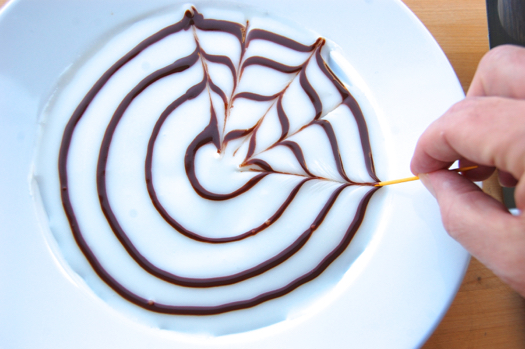
…all the way around.

Once you’ve done that two or three times (I mean heck, you’ll have plenty of extra fondant and ganache) you’re ready for the Big Dance. It’ll be little different on the chilled torte since there’s apricot glaze on it, but go forward bravely. You’ll swear you’re messing the whole thing up until it becomes obvious that it’s really working just fine. A little glaze might show through here or there, don’t worry. You’re not serving this to Pierre Hermé, am I right? Or maybe you are, in which case you’ll need a much better pastry coach than me. Immediately start searching other websites for help.
You’ll want to push the fondant out toward the edge but not completely TO the edge, since the fondant will continue to slowly spread for the next minute or so. You don’t want it to overflow the sides because the drooping fondant will stretch your whole top design out. But again, don’t let the prospect ruin your life. If you get some topping drip, don’t sweat it.

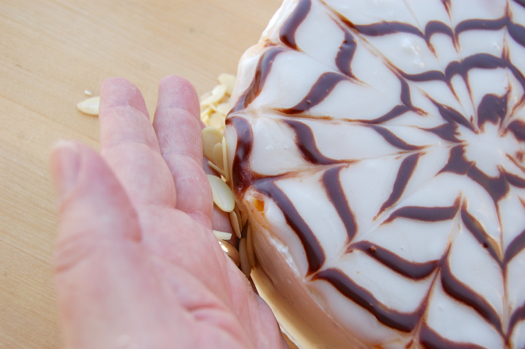
It’s why God created almonds. And indeed you’re going to want to press them all around the outside of the torte as a last step. If the buttercream is still firm from the refrigeration, no problem, just let it warm up for half an hour or so until the buttercream around the outside gets sticky enough to hold the nuts.
At that point put the whole thing in the fridge to chill until serving. Kinda purty.
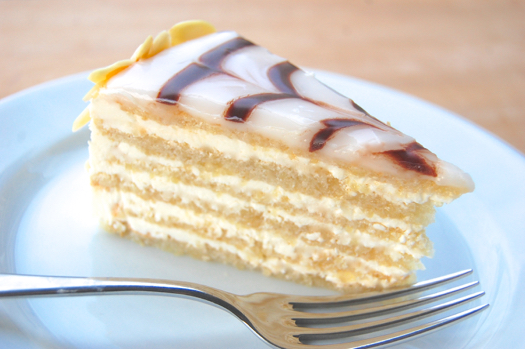
Slice it with a sharp knife and serve to amazed dinner guests.
Amazing stuff Joe! I might just give it a go!
Thanks, Alison! Send me a picture!
– Joe
Ooh, that’s lovely! There’s a trick I read about and have used on ordinary layer cakes: to put sliced or chopped nuts on the sides of the cake, don’t frost (glaze) the top layer yet. Turn the whole construction on its side and roll it through the nuts spread out on waxed paper. This beautiful cake might be too fragile for such treatment, but it works fine on the ordinary. You do need far more nuts than you thought possible, to make sure of covering the whole side. Besides, the leftovers taste good.
Hey Sally!
Interesting technique! That could work assuming the assembled torte was thoroughly refrigerated first, then allowed to warm at room temperature for about 10 minutes so the outer layer of buttercream has a chance to soften. I’d still do the hand-patting method myself, but who am I to stifle innovation?
– Joe
whats the texture of the dacquoise supposed to be after its baked -crispy like meringue or slightly chewy? tx tracy
Hi Tracy!
It’s surprisingly cake-like. It’s the high baking temperature that does it. A lot of meringues are baked low and long, which (intentionally) dries them out. These layers are baked high and fast so they retain their moisture. You can do either, though a more tender torte is certainly easier to cut!
Cheers and let me know if you try it!
– Joe
oic, tx
someday if im feeling particularly industrious.. 🙂
Well worth the wait Joe. Es ist sehr schön!
Thanks very much, Johan!
This project was a comedy of errors, between the weather, the complexity of the project and some silly organization mistakes on my part. At least I finally got it done! Thanks for a great idea.
– Joe
This isn’t my fave dessert but you have prepared it beautifully. Your fondant looks PERFECT.
Thanks, K!
I had a good time doing it. Fondant is pretty fun to work with I think.
But that raises an important question…what IS your favorite dessert?
– joe
Very nice! I have never seen this one before though all the techniques are familiar. That is a very classy pastry & would definitely be an impressive flourish whenever you served it. Thanks!
Thanks, Frankly! It does have that sort of Old World baroque feeling to it, doesn’t it. Something you’d serve at the end of a multi-course meal that started with a savory vol-au-vent. Maybe I’ll do that this weekend!
Cheers,
– Joe
What the What? Vole vents? Not in my house buster! sorry, I’m in a weird mood tonight.
Ya gotta make sure you’re holding the critters by the tail so they don’t bite, then you wan to…oh heck it’s all in a tutorial on the left side menus. Look under “small game and vermin”.
– J
Oooh la la! Very nice cake, very nice slice!
Ha! Thanks very much, Chana!
– Joe
This is lovely! I’m tempted to make it for Christmas. How, and how long, do you freeze the baked layers? And how far in advance do you think I could assemble and refrigerate it without losing too much quality?
Hey Carolyn!
I froze mine for just a couple of days, but well wrapped they’ll keep for a couple of months. I think it’s also easier to liberate them from the parchment paper when they’re frozen, so even a little freeing is useful. Let me know if you try it!
Cheers,
– Joe
“not the bottom (which is too cool) or the top (too hot). ” Is this the same for gas and electric ovens? I thought the (main) heat source in a gas oven was under the floor. Though it’s true hot air rises in all cases.
Hey Sandra,
Both kinds of ovens will be warmer up top and cooler down below, unless they’re convection in which case they’ll be hot all over! The middle racks are generally the safest, but if you rotate the pans a couple of times after the first 8 minutes or so you could probably bake all three at once if you wanted.
Cheers and have fun!
– Joe
You’re a wonder! I WANT some.
Ha! Thanks, Rainey! Stop on over before the graduate students get here, at which point it will be toast.
– J
Soooo, was it delicious??
Ha! You know in my universe Jodie buttercream is never not delicious. But I have to say that the dacquoise combined with the smooth and fruity apricot jam and the sugary jolt of fondant made this one particularly wunderbar. You should try it!
– Joe
I’d like to thank you in advance for saving my first attempt at fondant from failure. The pictures of the fondant before and after amazed me. It really does look too thick at first yet it smoothed out so nicely. Incredible stuff.
Johan
This looks so cool! I recently made a crepe cake, which is entirely different except they both involve lots of layers. I love how they look when you cut into them!
I want a picture next time! 😉
– Joe
Tempting to make – any excuse to scarf down more buttercream is welcome. Can you use Bob’s Red Mill Almond Meal in place of grinding up almonds in the food processor or would that give an inauthentic texture?
BTW, I think I will make Yotam Ottolenghi’s rose meringue roulade instead of a buche noel this year – has anyone tried it? Except I will not even try to find the rose petals. It wouldn’t be an Ottolenghi recipe without at least one difficult to source ingredient.
https://www.youtube.com/watch?v=OKgPPYahJvE
Thames I was a few miles away from you tonight having dinner at Amber in Westmont. I still owe you flour!
But that’s a great idea, using pre-ground almond meal. It’ll work great.
I have not tried that but it sounds like fun!
– Joe
Come on by – we would love to have you. The house is a bit crazier now as we now have (welcome surprise) baby number four! The future belongs to those who populate it.
Woohoo! Congratulations!
– Joe
All the sliced almonds I saw in the store today had brown edges. How are yours so nice and white?
Hey Thames!
You can usually find them peeled and sliced as well. Maybe try Whole Foods?
– Joe
This pastry is more beautiful than I am
It’s a lot more beautiful than me, Noah. It’s why I blog instead of go on TV. I have the perfect face for it.
Cheers and thanks!
– Joe