How to Make Ladyfingers
I was going to write about how to modify ladyfingers before putting up the tutorial, but I think it’ll be easier to show the recipe first, then talk about adjustments. Ladyfingers are a lot easier to make than this series of photos might make them appear. They require a few steps, but the batter is nowhere near as temperamental as, say, macaron or even génoise batter. So go forward fearlessly.
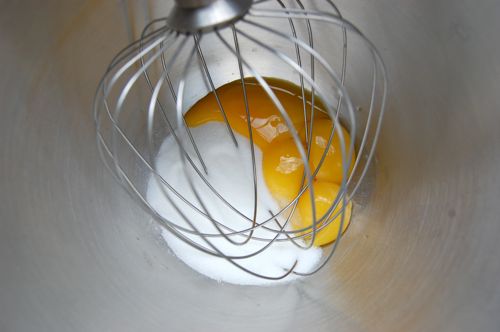
Preheat your oven to 375. Put the room-termperature egg yolks and 2.5 ounces of the sugar in the bowl of your mixer.
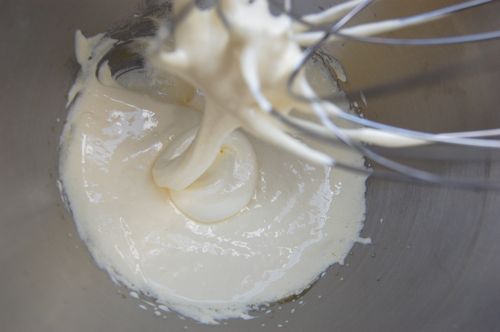
Whip until very pale, voluminous and thick. You want the first ribbons that fall off the whip to be meaty, like so:
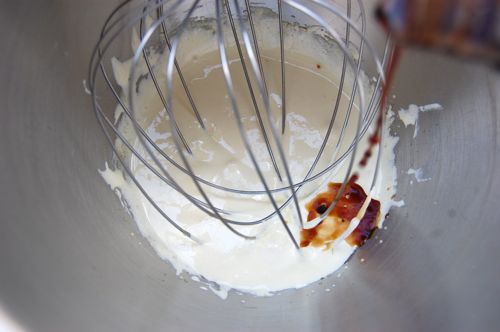
Add your vanilla and whip another 10-15 seconds.
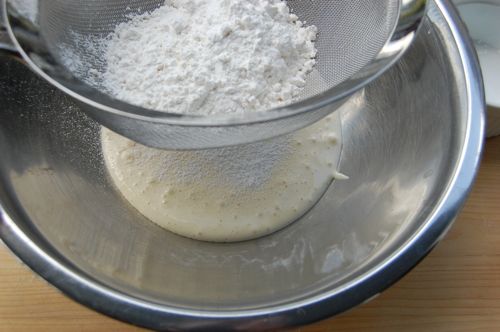
Scrape the mixture into a large, shallow bowl and sift the flour over it. Sprinkle on a pinch of salt and set the bowl aside.
Now for the meringue. Wash and dry your bowl and whip. Put the room-temperature whites in the bowl…
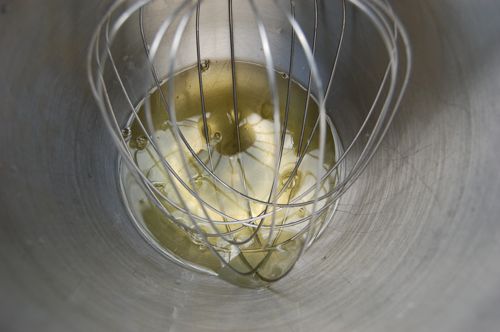
…and whip until frothy. Add the cream of tartar (this strengthens the foam).
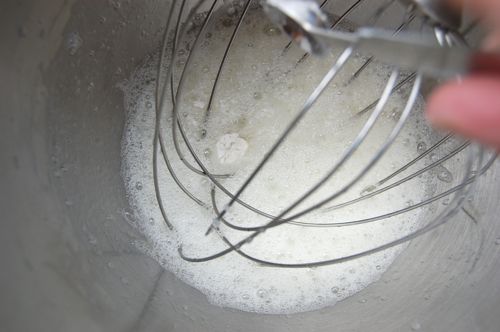
Whip to soft peaks and start adding in the last ounce of sugar.
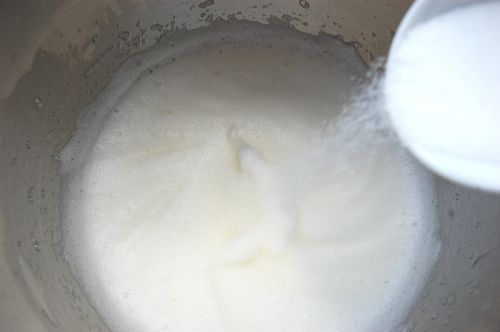
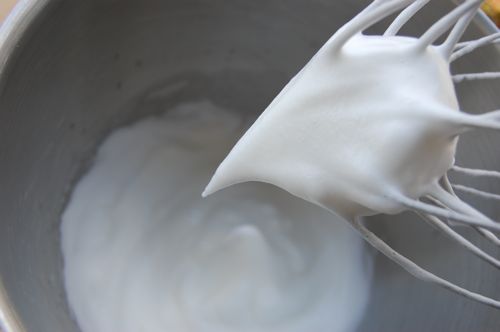
Whip to the “bird’s beak” stage.
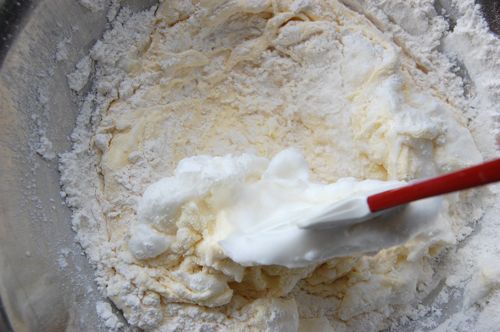
Now all we do is combine our foams. Start by simply stirring the first third of the meringue into the bowl containing the yolk mixture and flour. It’ll look a little messy at first, be not afraid. What you’re trying to do is simply combine everything and lighten the mixture a little. Stir until there are only a couple of spots of unincorporated foam.
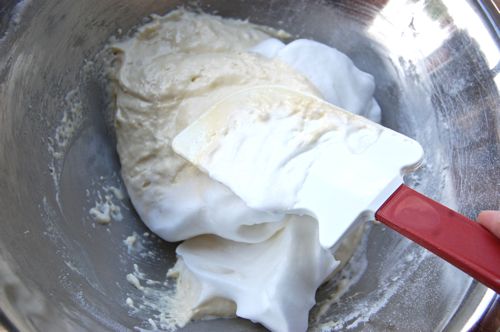
Now start your folding in earnest. Fold in the next third of the meringue gently, then the next (for more detailed instructions on folding, see the tutorial under the Techniques menu).
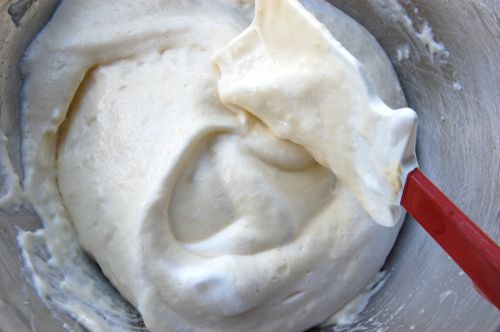
Here’s about where you want to be when you’re done. Notice that there are a couple of blobs/streaks of meringue still left. That’s a good thing.
Scoop the batter into a large fabric pastry bag fitted with just the coupler — no tip — and prepare to pipe! (For more on assembling pastry bags, see the tutorial under the Techniques menu). You want to do this fairly promptly, because the batter will start to lose its fluff. First, drop a spot of batter at each corner of the sheet pan, this will glue down your parchment paper.

See?
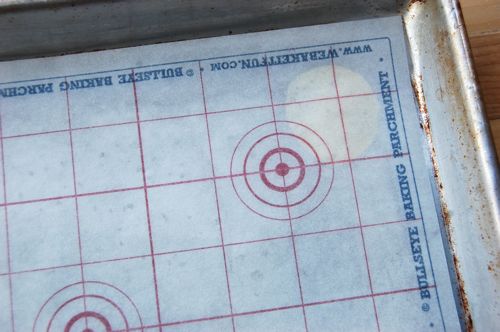
Hey! What’s that funky parchment paper? Oh just a little something from the folks over at Bulls Eye Baking Company: pre-measured paper that helps you pipe, place and cut a whole bunch of different stuff. Pretty cool, and especially handy for jobs like ladyfingers, where consistency is crucial. (No, they didn’t pay me to write that, but they did send me two dozen free sheets, which is serious swag when you consider the economics of blogging). Pipe your ladyfingers about like so:
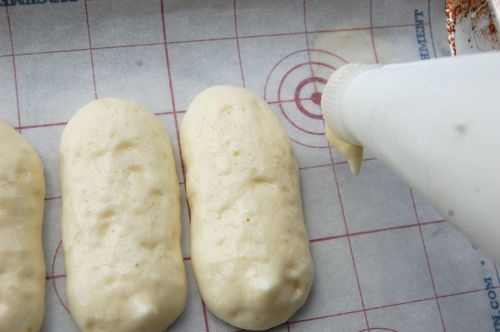
What you want to do here is pipe them about 1 1/2 inches wide by about 3 1/2 inches long. Go as straight as you can, leaving about 1/4 inch gap between the fingers. But Joe, won’t they bake into each other as they rise in the oven? Indeed they will, and that’s what I want, for ladyfingers tend to spread out as they bake. If I leave a large gap between them, the result will be flatter, crispier cookies. I want mine taller and more cake-like, so I pipe them close together. The batter will still expand, but what can’t spread out must go up, it’s one of Pastry’s Elementary Laws of Batter.
When piping, be sure to resist the temptation to touch the nozzle-end of the bag to the sheet. Keep it a good half inch or so up in the air so the batter can pour out and puddle a little. Just go slowly, you’ll see what I mean.
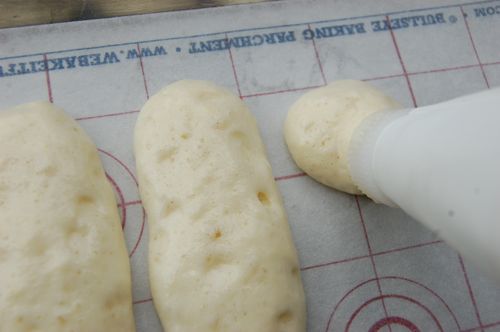
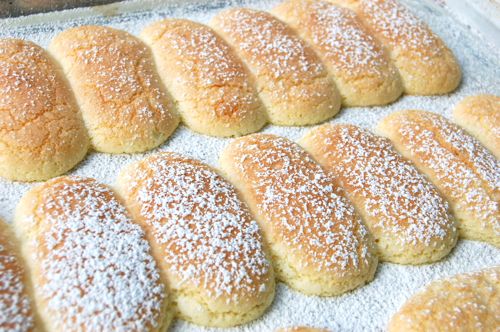
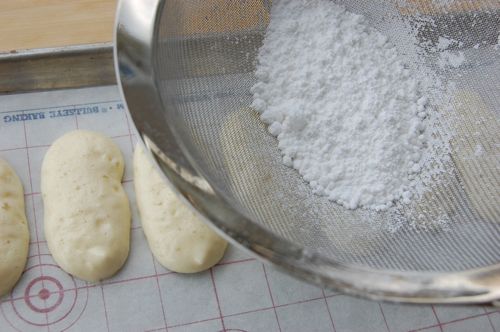
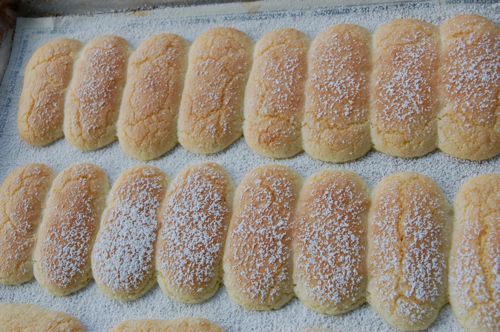
These aren’t perfectly straight, but hey, it’s tough to pipe and take pictures at the same time, so cut me some slack! In truth piping isn’t my strong suit. The good news is that in the world of ladyfingers, baking redeems many a piping sin. Now just dust on some powdered sugar. You can also use superfine sugar if you like a slightly crustier finish. Up to you.
See? You can hardly tell how lousy I am at piping. Quite nice…and they taste good, too.
how long do they bake
Hi Shania! About 8 minutes.
– Joe